AUTHORIZE ADDITIONAL USERS
The Authorize feature within Noki Exchange allows the owner of a compartment to grant access to additional users. This feature is perfect for allowing hospitality, real-estate agents, or friends into your space when you’re not around to leave them a key.
1. TAP THE AUTHORIZE BUTTON


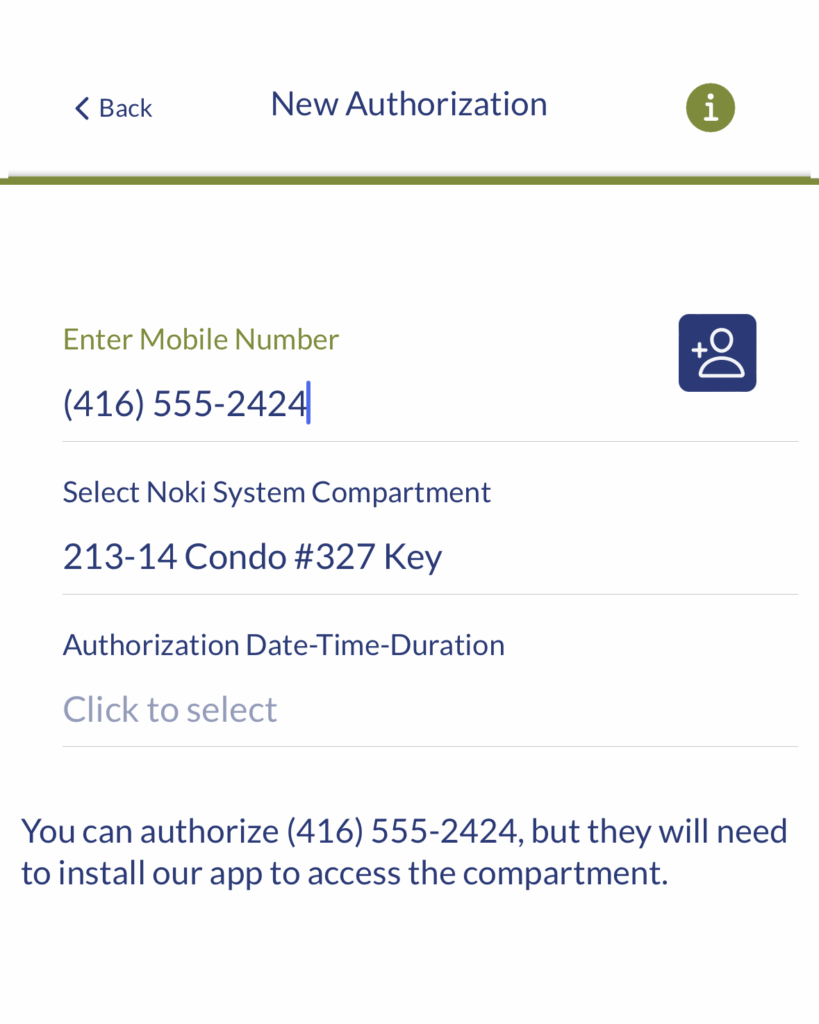
2. ENTER USER'S MOBILE NUMBER
Input the mobile number of the person you wish to authorize. If they are already in your phone contacts, you can select their name from the list by tapping the blue plus button.
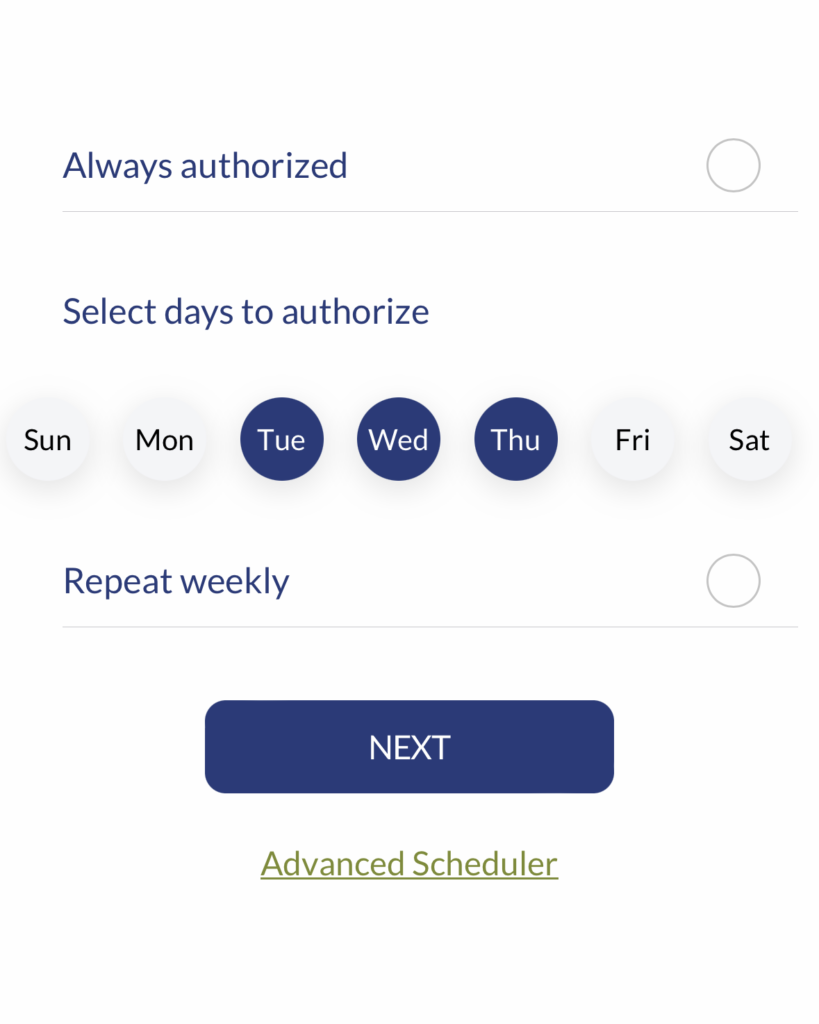
3. SELECT AUTHORIZATION TIME
Allow this user to always have authorization, or pick a specific day of the week. Use the advanced scheduler for even more precise scheduling.


4. ADVANCED SCHEDULER (OPTIONAL)
If you need your authorization to be more specific, use the advanced scheduler to pick specific dates on the calendar.
5. SELECT TIME (OPTIONAL)
With the date selected, tap and drag to select a specific time block to allow this user authorization.


6. CONFIRM AUTHORIZATION
Once your time is selected, you will be asked to confirm the authorization.
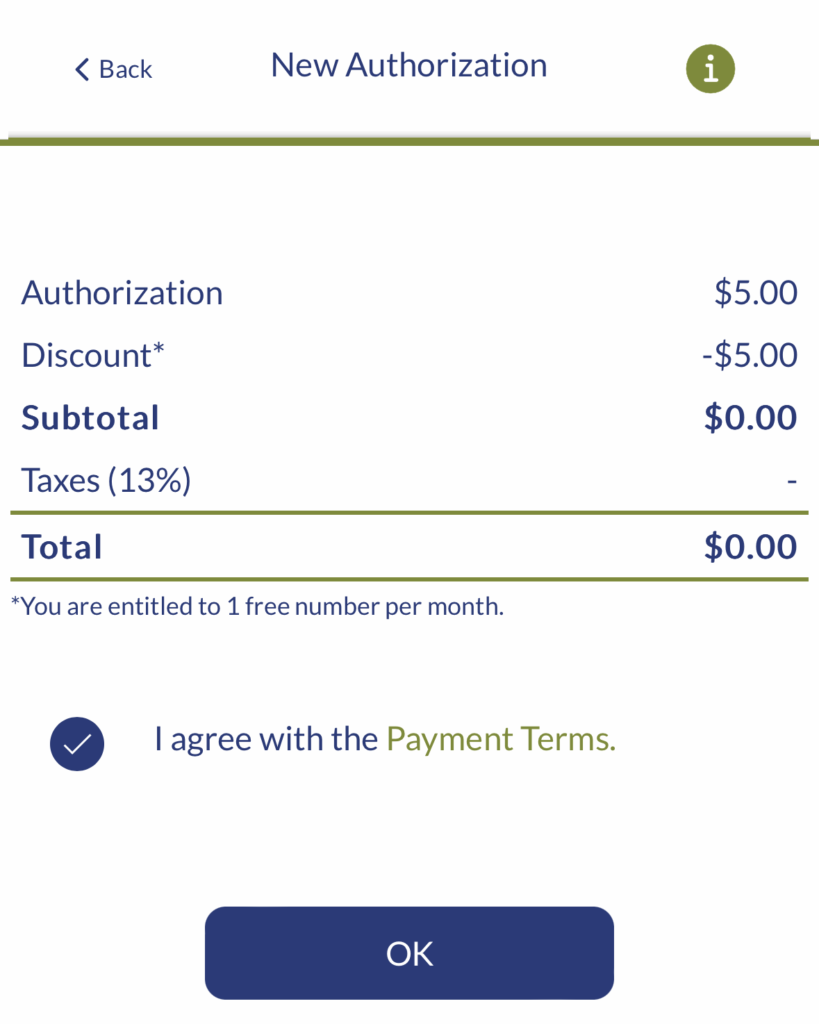
7. CONFIRM PAYMENT
Based on your booking plan, you may need to pay to authorize additional users. Once payment is confirmed, your new user will receive a text message prompting them to download Noki Exchange. From there, they will have access to your compartment.


8. RECEIVE AUTHORIZATION TEXT
The authorized user will receive a text message with an authorization code, prompting them to access the compartment. You can monitor and end the authorization at any time from the Authorize screen in the Noki Exchange app.
